As a product designer, I’ve witnessed firsthand the transformative power of using injection mold textures to add a finish or texture to a part, elevating it from simply functional to captivatingly delightful. And believe me, choosing the right texture is an art form in itself, a delicate balance between purpose, form, and production feasibility.
Adding texture isn’t just about creating eye candy. Sure, it can play a crucial role in aesthetics, adding visual interest and personality to a product. But the real magic lies in its functional potential.
That’s why, when approaching a part to add texture, I always start with a fundamental question: what’s the purpose? Is it purely decorative, enhancing the visual appeal and brand identity? Or does it serve a specific function – like improving grip, preventing glare, or even channeling heat? Answering this question becomes the cornerstone of the design direction.
Material Matters
Next, when considering injection mold textures we must acknowledge the mold material itself. We need to understand that textures react uniquely to plastics and composites. It is crucial to understand the limitations and opportunities of the chosen material, its texture compatibility, and potential processing constraints. Can we achieve delicate details with this material? Will deep grooves pose ejection difficulties? By considering these factors upfront, we avoid costly production surprises and ensure a smooth process from design to reality.
Part of the Whole
Finally, we consider the part itself. How will the texture interact with the overall design and functionality? Will it be a subtle accent, enhancing ergonomics like a strategically placed finger grip? Or will it become a defining feature, influencing how users interact with the product? Answering these questions ensures the texture complements the part’s form and function, creating a harmonious union of aesthetics and practicality.
The Injection Mold Textures Toolbox
With the design direction set, let’s take a look at the different texture types. The first crucial decision is depth and scale: do we want a delicate microtexture or a bold, three-dimensional pattern? Understanding the desired effect helps us identify the most appropriate method, from the precision control of laser etching to the cost-effective versatility of chemical etching.
Pattern and complexity also play a vital role. Simple, repetitive patterns might be perfectly achievable with manual techniques, while intricate geometric designs or organic textures might call for the high-tech finesse of laser micromachining. Choosing the right method ensures the texture is not only aesthetically pleasing but also structurally sound and cost-effective to produce.

Leatheret surface finish (Source: Pixabay)
The Draft Angle – An Unsung Hero
When textures are involved, draft angle requirements for mold tools become crucial for successful part ejections. The deeper and more intricate the texture, the greater the draft angle needed to prevent part damage and ensure smooth removal. Here’s a breakdown of draft angle considerations for different texture types:
Light Textures (0.001″ – 0.005″ depth) or (0.0254 to 0.127 mm):
- Standard Draft Angle: 1 – 2 degrees is typically sufficient for light textures like brushed finishes or small stipples.
- Considerations: Wall thickness and material shrinkage can necessitate slight increases in draft angles.
Moderate Textures (0.005″ – 0.010″ depth) or (0.127 to 0.254mm):
- Recommended Draft Angle: 3 – 5 degrees are generally recommended for textures like leathers or woven patterns with moderate depth.
- Additional Factors: Undercuts within the texture might require even higher draft angles to avoid sticking.
Heavy Textures (0.010″ – 0.020″ depth) or (0.254 to 0.508mm):
- Critical Draft Angle: At least 5 – 10 degrees are crucial for deep textures like wood grains or complex geometric patterns.
- Potential Challenges: Sharp corners or deep grooves within the texture might require localized draft angle adjustments for smooth ejection.
General Rule of Thumb for your draft angle
- 1.5° draft per 0.001″ (0.0254mm) of texture depth is a helpful rule of thumb, but it’s to be adjusted based on the specific texture type and other factors.
The Mold Texture Book
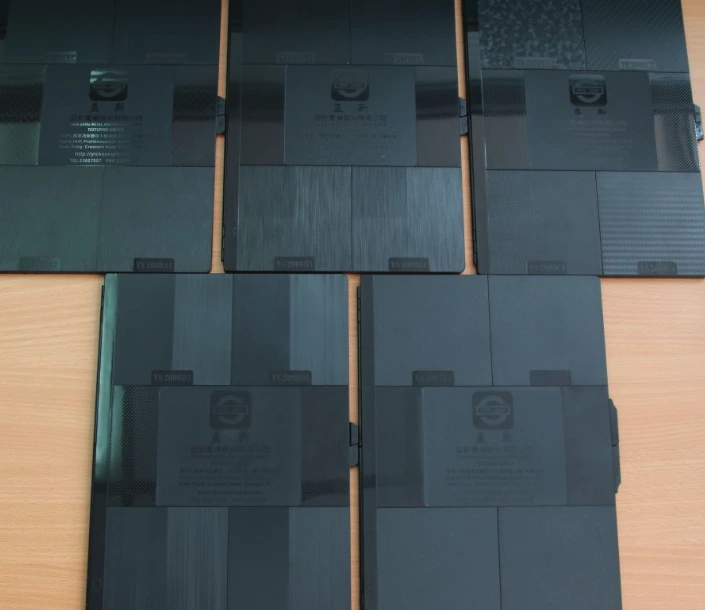
Now, let’s talk about my ‘go-to’ guide for textures – the “mold texture book.” This is a collection of actual texture plaques, that allows you to feel the grooves and ridges under your fingertips, and it is a sensory experience that helps visualize how a specific texture will translate onto your product.
Designers, engineers, and manufacturers can use these books to browse and select the required injection mold textures. The plaques allow them to feel and visualize the textures in person before adding them to their molds.
Some popular examples of physical mold texture books include:
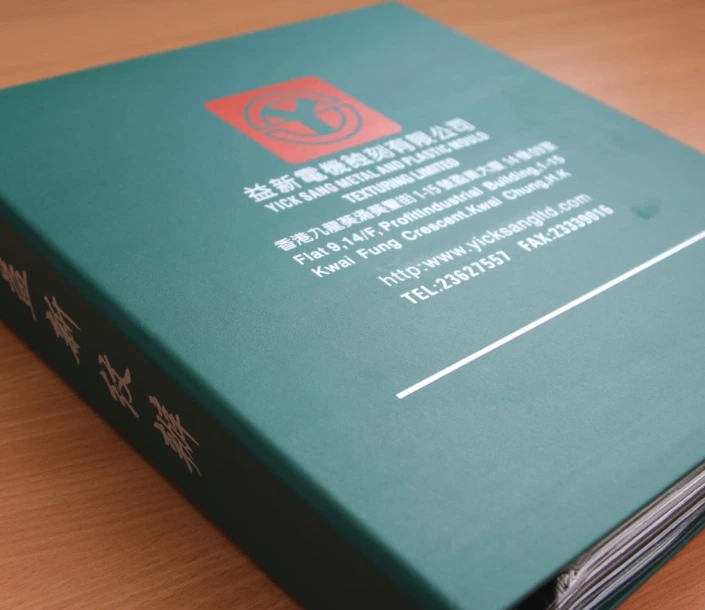
- Yick Sang Texture Book (Classic Version): Features 240 unique texture plaques with four-digit codes. This is the book I use as it has an extensive range of textures and is widely used by Chinese tool makers (and we offer these mold texture books for sale at Sofeast).
- LW Texture Book: Offers a variety of textures, including geometric, organic, and natural patterns.
- Plastipol Mold Tech Texture Book: Provides a comprehensive guide to textures achievable with specific mold technologies.
Here’s what the Yick Sang mold texture book looks like:

Image source: yicksangltd.com
The most Commonly Used Process: Chemical Photo etching for creating Precise Textures on Mold Tools
Chemical photo etching is a powerful technique for adding intricate and high-precision injection mold textures to the surface of the tooling. It stands out as a popular choice for several reasons:
- Precision and Detail: Imagine carving delicate patterns into wood. Photoetching allows for similar control, creating sharp lines, fine details, and complex textures with remarkable accuracy.
- Versatility: Unlike some methods limited to specific materials, photo etching works on various metals, including steel, aluminum, and nickel, as well as plastics. This flexibility lets us experiment with different materials for mold tools.
- Durability: The etched textures are inherently durable, able to withstand the wear and tear of repeated molding cycles without losing their definition or sharpness. This ensures consistent quality in produced parts.
- Cost-effectiveness: For small and medium-sized mold tools with intricate textures, photo etching is often more cost-efficient than other methods like manual engraving or EDM spark erosion. It offers a balance of precision and affordability.
- Repeatability and Control: Unlike manual techniques, photo etching relies on light and chemical reactions, ensuring consistent results with minimal variation. This leads to predictable texture quality and reduces the need for rework or scrap.
Some examples of textures from the Yick Sang Texture Book (Classic Version) along with their 4-digit codes:
To bridge the gap between technical specifications and tangible understanding, let’s explore some texture codes and their corresponding visual representation.
Smooth and Refined:
- YS1286: Mirror Finish: A super smooth and reflective surface, perfect for high-gloss products like phone cases or kitchen appliances.
- YS1432: Satin Touch: A slightly textured finish with a soft, silky feel, ideal for cosmetic packaging or decorative elements.
- YS1871: Eggshell Ripple: A subtle wave-like pattern that adds elegance without being overbearing, suitable for furniture or lighting fixtures.
Natural Textures:
- YS1629: Crocodile Leather: A realistic crocodile skin texture, perfect for adding a luxurious touch to handbags or shoes.
- YS1754: Bamboo Grain: A subtle bamboo grain pattern, ideal for creating a natural and organic feel for tableware or spa products.
- YS1908: Linen Weave: A fine linen weave texture, adding a classic and sophisticated touch to stationery or textile products.
Functional Textures:
- YS1398: Orange Peel: A raised, bumpy texture providing excellent grip, ideal for tool handles or sports equipment.
- YS1510: Micro Dot: A tiny dot pattern for a soft grip and anti-slip properties, suitable for phone cases or remote controls.
- YS1815: Diamond Grid: A raised diamond grid pattern for excellent drainage and ventilation, perfect for food containers or shower mats.
Creative and Decorative:
- YS1204: Herringbone: A classic herringbone pattern for adding visual interest and a touch of tradition, ideal for architectural elements or furniture.
- YS1457: Paisley Swirl: A swirling paisley pattern, perfect for adding a unique and eye-catching element to jewelry or decorative pieces.
- YS1783: Geometric Maze: A raised geometric maze pattern, adding a playful and modern touch to packaging or toys.

Image source: yicksangltd.com
Navigating the Nuances: Ensuring Precise Texture Execution with Chinese Tool Makers
In my experience, achieving your desired effect hinges on clear communication, especially when working with Chinese tool makers. Unlike some Western manufacturers who readily interpret design intent, Chinese tool makers often require meticulous detail to guarantee accurate execution. So, when it comes to injection mold textures, leave no room for guesswork. Here are key points to remember:
Be Explicit, Not Implicit: Don’t rely on suggestive keywords or visual references alone. Precisely define the texture in technical terms, using established industry standards or reference numbers from a recognized mold texture book. Include detailed descriptions of:
- Pattern and Complexity: Clearly define the geometry, spacing, and depth of the texture elements. Specify whether it’s a simple grid, organic pattern, or intricate geometric design.
- Surface Finish: Describe the desired surface texture – smooth, matte, glossy, or with a specific grain size.
- Draft Angle: Indicate the precise draft angle required for smooth part ejection, especially for deep or intricate textures.
- Material Interaction: Specify how the texture interacts with the surrounding surface – seamless integration, raised element, or recessed pattern.
Embrace Visual Aids: While detailed descriptions are crucial, visual references further cement your vision. Provide high-resolution 2D or 3D models along with technical drawings that clearly illustrate the texture and its interaction with the part. Consider including magnified views of intricate details.
Leave No Room for Ambiguity: Clearly specify tolerances for dimensional accuracy and surface finish. Define acceptable deviations and outline rejection criteria for textures that deviate from your specifications.
Preemptive Quality Control: Consider requesting a first article inspection before full production commences. This allows you to identify and address any discrepancies in the initial part before larger batches are produced, saving time and cost in the long run.
Remember: While clear communication is paramount, building a trusting relationship with your Chinese toolmaker goes a long way. Openly discuss potential challenges, address concerns promptly, and provide constructive feedback throughout the process. By employing these strategies, you can ensure Chinese tool makers translate your design criteria into a final product that meets all specifications.
If you are interested in stress-free mold fabrication, we can help you!
Technical Summary: Adding Injection Mold Textures
In this article, I have tried to outline the strategic considerations and technical nuances of integrating texture into molded parts. It emphasizes the functional benefits of texture beyond aesthetics, including enhanced ergonomics, safety, and user experience.
Key Takeaways:
- Purpose-driven Design: Clearly define the functional purpose of the texture (grip, anti-glare, etc.) to guide material selection and fabrication methods.
- Material Compatibility: Understand the texture compatibility of the chosen mold material and its processing limitations to avoid production issues.
- Part Integration: Consider how the texture interacts with the overall part design to ensure seamless functionality and aesthetic harmony.
- Texture Selection: Choose the appropriate texture depth, scale, and complexity based on the desired effect and production feasibility.
- Draft Angle Understanding: Employ the correct draft angle to facilitate smooth part ejection from the mold, especially for intricate textures.
- Mold Texture Resources: Utilize physical and digital mold texture books for inspiration and selection of suitable textures.
Technical Implications:
- Understanding the strengths and limitations of different texture creation methods (laser etching, chemical etching, etc.).
- Calculating the optimal draft angle based on texture depth and complexity.
- Evaluating the impact of texture on material properties and part functionality.
- Selecting appropriate surface finishes and coatings for textured surfaces.
Get help with your plastic injection molding
Our sister company, Agilian Plastic & Molds (AgP&M), handles tooling fabrication and plastic injection molding parts in China.
It provides these 3 key benefits:
- You avoid relying on external suppliers to design & fabricate your plastic injection molds which is an IP risk and might be ‘lost.’
- You control the exact type of polymer used avoiding the risk of a cheaper one being used without your knowledge.
- We can detect and manage risks better, and handling this in-house also helps us to provide better design tips.
You might also like this podcast episode where we discussed injection mold textures
Listen to this podcast episode:


